Item-Level PowerBI Reports
PowerBI Reports can also provide information at an item-specific level. This means that instead of creating a report for all items, the report instead focuses on visualising data from a single item and its linked data.
For example, a report can be placed inside a tab on an item. This PowerBI report will then display information specific to the item that contains the report.
- A user opens an item that contains a PowerBI Report.

- They then navigate to a tab or page where the item-specific report is located.

- The user can now view a report that only displays information about the specific item that the report is attached to.
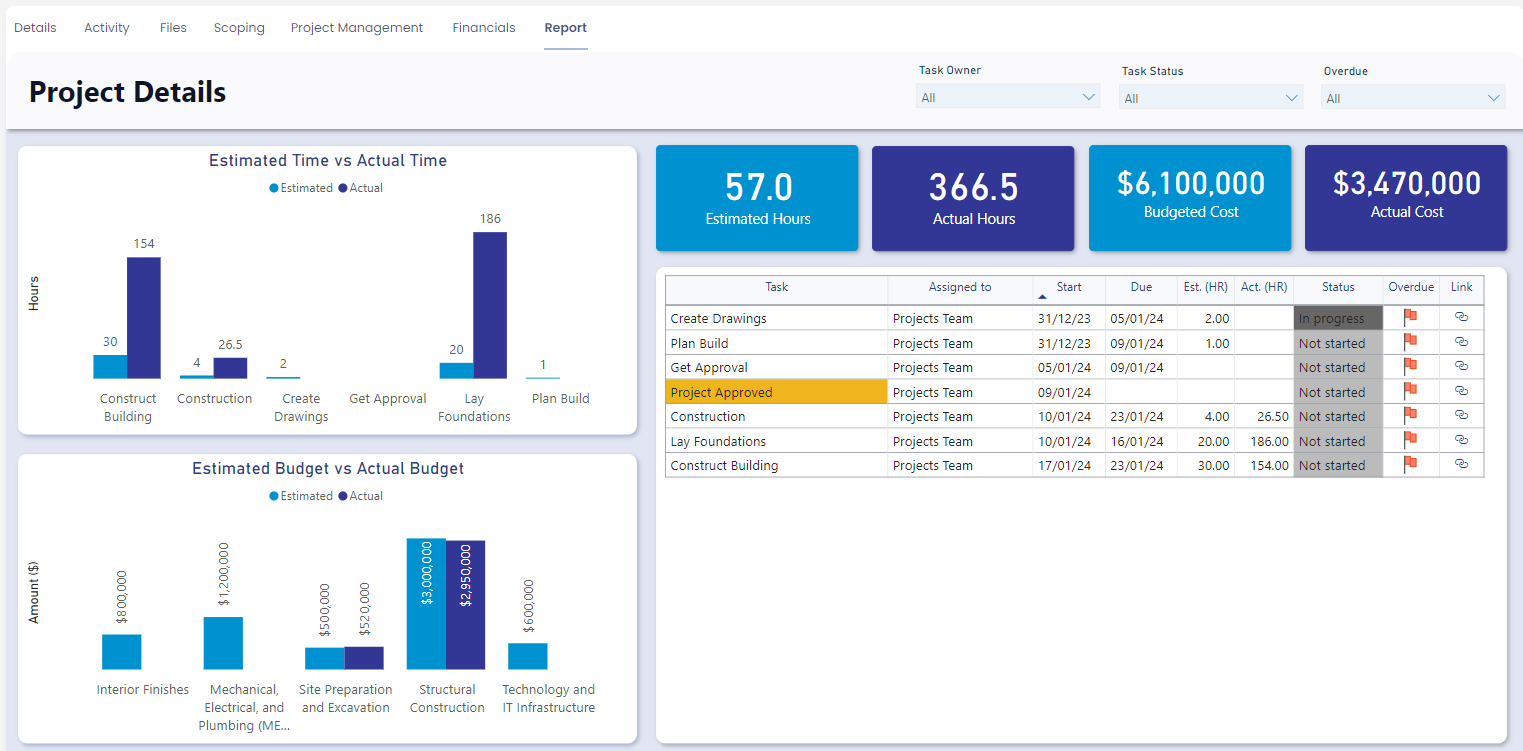
Pictured: an example of an item-level report in Rapid. This example is from the Rapid Standard "Projects" module.
An item-level report will change depending on the Rapid item that it is attached to. This report reveals budgetary information for projects. Opening another project item will display the same report, but with the information of the new project.
Rapid Platform achieves this by placing the following filter on the report:
{listname}:{id}
This simply tells Rapid to only return information in the report that is attached to the current item's ID.
How to Enable Editing for an Item-Level Report
All PowerBI Reports in Rapid are able to have editing "enabled". This provides users with the ability to make small improvements to a PowerBI report without leaving the Rapid site.
To enable editing:
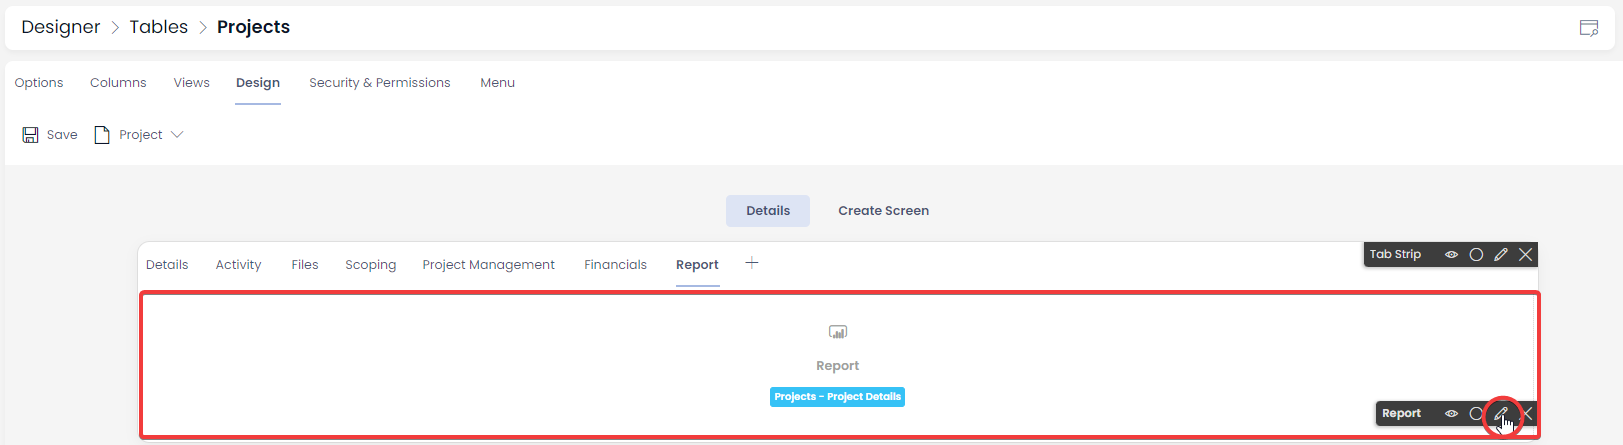
- Go to a Report using Explorer.
- Switch to the Designer application using the Designer button in the upper-right corner of the site.
- Under the Design tab, ensure you are viewing the correct page or tab where the Report is located. In this example, the Report is contained in a tab labelled "Report"
- Hover your mouse over the Report component, and select the pencil icon to edit the component.
How to Upload or Replace an Item-Level Report
From the same editing panel in the previous section, the user can also upload an existing report from your site, or replace an existing report.

Note that the user can choose to either "Select Existing Report" or "Upload a New Report". The user cannot do both.
-
When uploading an item-level report, ensure that Filter Report At Item Level is toggled to Yes.
-
The Select Existing Report option allows the user to choose a report that has been uploaded elsewhere to the site, and to also present that report inside this component as well. For example, a report could be uploaded on a separate page to collate item data; then, the same report could be uploaded at the item-level. Any edits made to a report will also affect the other locations where the report is uploaded.
-
The Upload a New Report option allows the user to click and upload a .pbix or .rdl file from Microsoft PowerBI. The user can also drag and drop the file from the OS onto the attachment box.
-
Ensure you press Save